India
Installation
Install the following modules to get all the features of the Indian localization:
Name |
Technical name |
Description |
|---|---|---|
Indian - Accounting |
|
Default fiscal localization package |
Indian E-invoice Integration |
|
Indian e-invoicing
Odoo is compliant with the Indian Good and Services Tax (GST) e-Invoice system requirements.
Important
Indian e-invoicing is available from Odoo 15.0. If needed, upgrade your database.
Registration on your NIC e-Invoice web portal
You must register on the NIC e-Invoice web portal to get your API credentials. You need these credentials to configure your Odoo Accounting app.
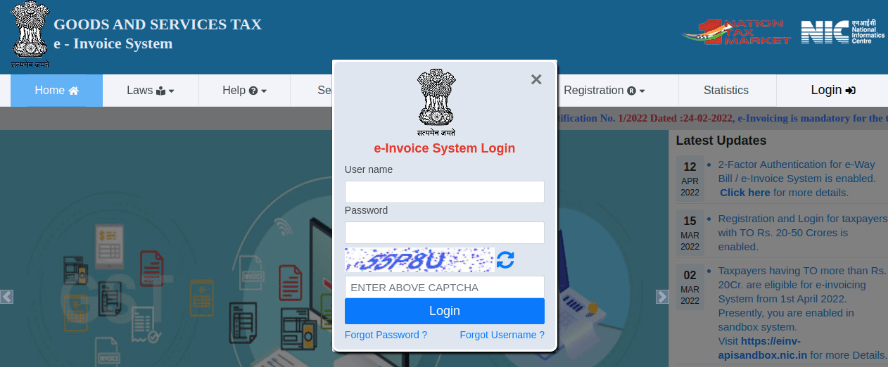
Login to the NIC e-Invoice web portal on - https://einvoice1.gst.gov.in/ by clicking on Login and entering your Username and Password.
Note
If you have already registered on the NIC Eway Bill Production portal, then you can use the same login credentials here.
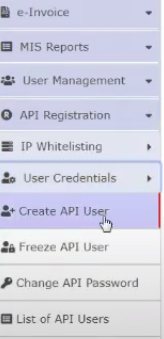
From your dashboard, go to .
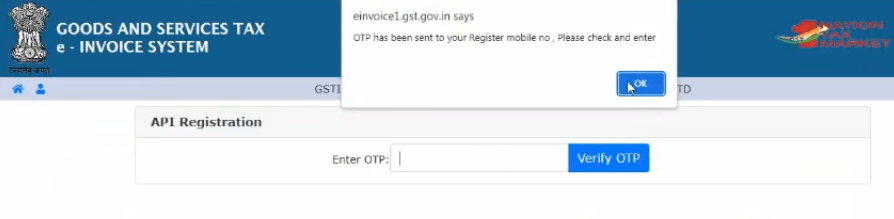
After that, you receive an OTP code to your registered mobile number.
Enter the OTP code and click on Verify OTP.
Select Through GSP in the first field, select Tera Software Limited as your GSP, and type in a Username and Password for your API.
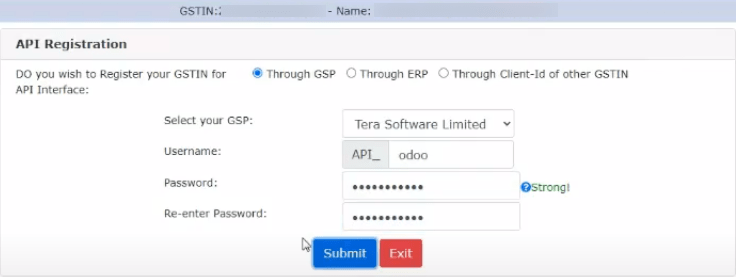
Click on Submit.
Configuration on Odoo
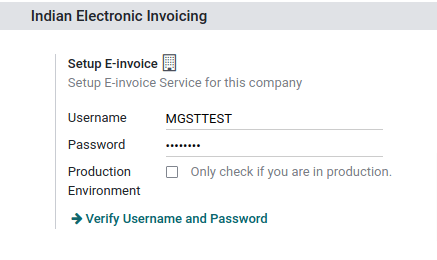
To set up the e-invoice service, go to , and enter the Username and Password.
Journals
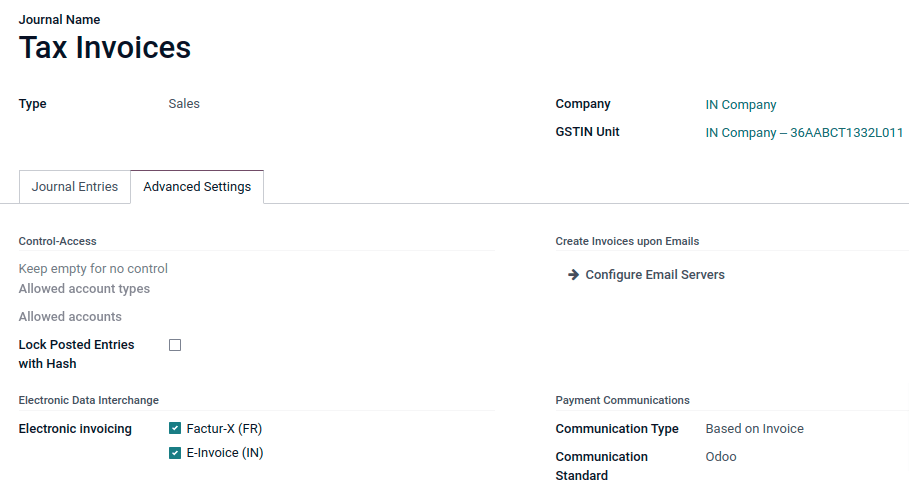
Your default sales journal should be already configured correctly. You can check it or configure other journals by going to . Then, open your sales journal, and in the Advanced Settings tab, under Electronic Data Interchange, check E-Invoice (IN) and Save.
Workflow
To start invoicing from Odoo, an invoice must be created using the standard invoicing flow, that is, either from a sales order or the invoice menu in the Accounting application.
Invoice validation
Once the invoice is validated, a confirmation message is displayed at the top.
Odoo automatically uploads the JSON-signed file to the government portal after a while. If you want to process the invoice immediately, you can click on Process Now.

Note
You can find the JSON-signed file in the attached files, in the chatter.
You can check the status of EDI with web-service under the EDI Document tab or the Electronic invoicing field.
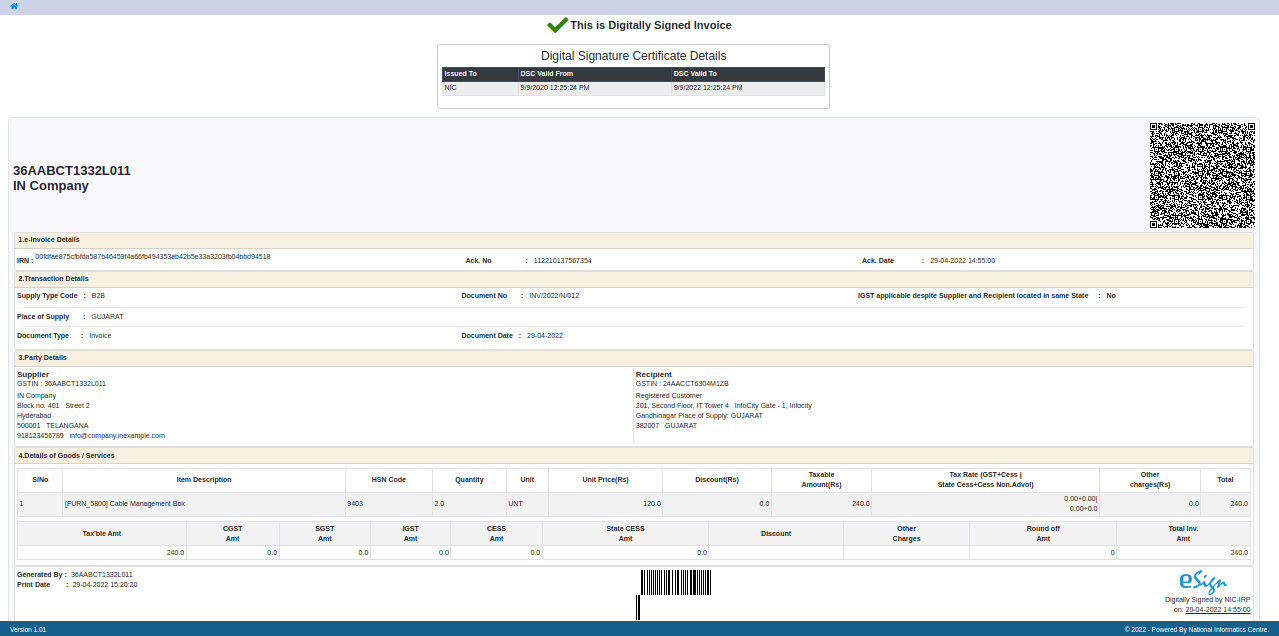
Invoice PDF Report
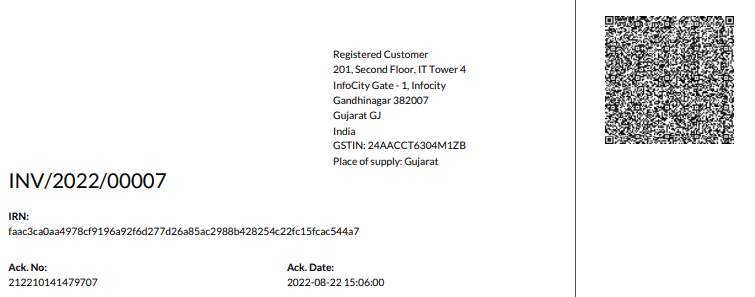
Once the invoice is submitted and validated, you can print the invoice PDF report. The report includes the IRN, acknowledgment number and date, and QR code. They certify that the invoice is a valid fiscal document.
EDI Cancellation
If you want to cancel an e-invoice, go to the Other info tab of the invoice and fill out the Cancel reason and Cancel remarks fields. Then, click on Request EDI cancellation. The status of the Electronic invoicing field changes to To Cancel.

Note
If you want to abort the cancellation before processing the invoice, then click on Call Off EDI Cancellation.
Once you request to cancel the e-invoice, Odoo automatically submits the JSON Signed file to the government portal. If you want to process the invoice immediately, you can process it by clicking on Process Now.
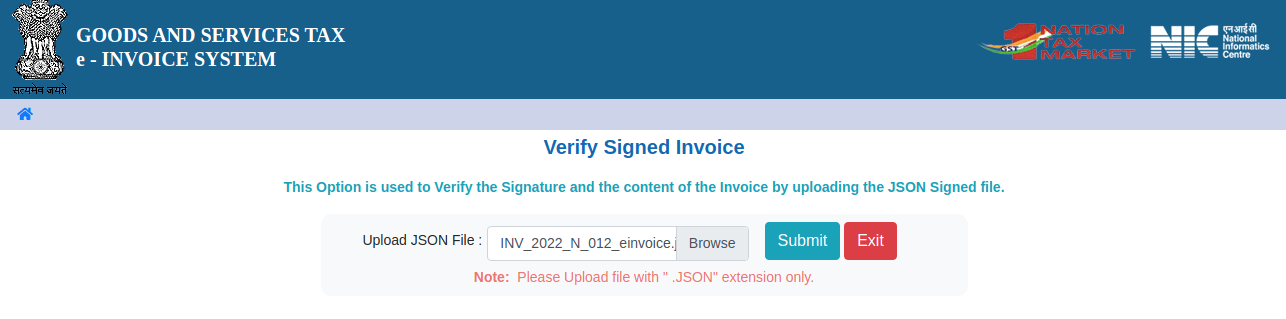
Verify the e-invoice from the GST
After submitting an e-invoice, you can also verify the signed invoice from the GST e-Invoice system website.
Download the JSON file from the attached files.
Open the e-invoice portal: https://einvoice1.gst.gov.in/ and go to .
Select the JSON file and submit it.
You can check the verified signed e-invoice here.